Passing Cyber Essentials on Linux: replace sudo with run0

Problem
If you use Linux as your work daily-driver you will almost certainly be used to
having sudo privileges. Giving you the ability to complete administrative tasks,
like installing and updating packages, using your regular user account.
But if you have to gain Cyber Essentials
accreditation – likely if you do business with UK public sector
organisations – this poses a problem. Cyber Essentials is very strict
about account separation. It does not let you use a day-to-day account for admin
tasks. For Linux, this bars the user from being a member of the sudo group.
You can try arguing with your assessors about this (we did) but
the guidance is pretty unambiguous.
This was the problem we faced. Our daily-driver laptops at Hartley McMaster run Fedora 1 and our team need to do what Cyber Essentials would consider “administrative tasks” fairly commonly in their daily work. This post shows how we met account separation rules without adding friction for admin tasks.
We passed Cyber Essentials Plus with this setup. If you use Linux workstations, follow along to pass too.
A false start
Our first idea was to improve the security of sudo by gating its use behind
multi-factor authentication. We tested and got this working quite quickly. A
user executing a sudo command would be prompted for their password, as usual,
and for a one-time code from Microsoft Authenticator (the second factor).
Unfortunately, while this was a real increase in security, it still failed
Cyber Essentials’ rules for account separation in the eyes of our assessors.
It met the spirit but not the letter of the requirement.
The fallback we were trying to avoid was to have team members manually switch between separate accounts. In our view, this would be “not good”.
- It would add significant friction.
- It could complicate the installation of some software (e.g., where it installs by default).
- It would increase the risk a user accidentally continues regular work on the “admin” account. Exactly the situation Cyber Essentials is trying to prevent.
Then we discovered run0.
What is run0?
run0 is a feature of systemd. It
provides user functionality very similar to sudo while operating quite
differently under the hood.
When you run a command with sudo in the terminal, it prompts you for your
password and then spawns a sub-process with root privileges to execute that
command. When you run a command with run0, it prompts you for the password of
a separate admin account and then requests systemd to create a completely
separate process with the root privileges necessary to run it.
We are obviously simplifying in our description – see this article for a more detailed description of the differences – but for our purposes the important factors are that:
- It satisfies the account separation requirements of Cyber Essentials;
- It does not weaken security (
run0is arguably more secure thansudo); and - It is no less convenient in practice to use than
sudo.
The creators of run0 have deliberately adopted the same syntax and most of the
parameter options of sudo so that you can use it as a drop-in replacement for
common tasks.
How to set this up
This will work with most modern Linux distros. Though systemd only added
run0 in version 256 (mid-2024), so older versions of distros may not have it.
Ubuntu 24.04 LTS doesn’t have it, for example, but Ubuntu 24.10 and newer do.
You can check whether your distro has systemd and run0 by running the
following two commands.
# Is systemd installed?
systemctl --version | head -n1   # need 256 or higher

# Does run0 exist?
command -v run0 || echo "run0 unavailable"
With this confirmed there are three simple steps you must do on each machine, with a fourth required only for SELinux systems.
Step 1 – Create a local admin account
Create a “local admin” user account, separate from your everyday user account.
This account needs to have sudo privileges.
Save the account password in your password manager. You will need to enter this
when using run0 (instead of your normal user account password with sudo).
For a workstation machine – a user’s laptop – we would recommend having only two accounts: the user’s and this “local admin” one. (We already had local admin accounts set up on each laptop for “breakglass” purposes, and reused those.) Use a unique local admin password on each machine.
Test to confirm that you can (1) log in as the local admin user and (2) that you
are able to use sudo with that account. Do not skip this. You do not want
to end up locked out of your machine in the event there is any issue with your
normal user account.
Step 2 – Remove sudo from normal user account
Remove sudo privileges from your normal user account. Since you are going to
use run0 instead, you don’t need them. And to pass Cyber Essentials you can’t
have them.
If you complete the Cyber Essentials Plus assessment, your workstation assessor
will ask you to show that sudo commands do not work.
Log into your local admin account and run the following to remove your normal
user account from the group which gives it sudo privileges. This group is
named either “wheel” or “sudo” depending on your distro.
# logged in as local admin user;
# substitute your actual normal user account name in place of "normal-user"

# on Fedora, RHEL etc.
sudo gpasswd -d normal-user wheel

# on Debian, Ubuntu etc. instead run
sudo gpasswd -d normal-user sudo
Step 3 – Test and confirm
Reboot your machine and log into your normal user account.
Try running sudo ls in the terminal. You should get a permission denied
message (something like “<user> is not in the sudoers file”).
Now run run0 ls in the terminal. A pop-up modal window will ask for the local
admin password. Do this and you should see the output from the ls command
(listing files in the current directory).
Two differences to note here.
- With
sudoyou enter your password in the same terminal, but withrun0you enter the (admin) password in a separate modal window. The difference is reflective of the fact that they work differently under the hood.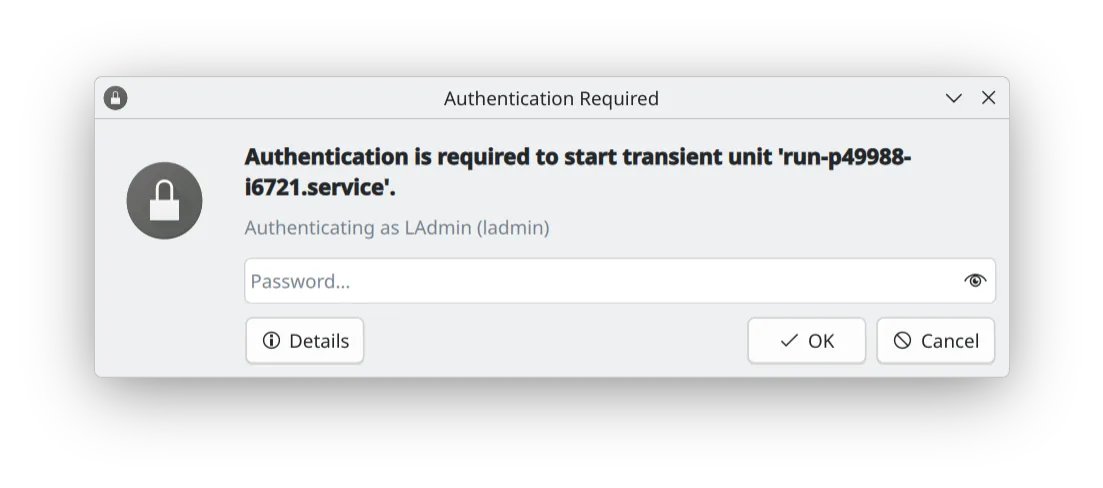
- Notice that the output from running a command with
run0has the background highlighted in red. This is a nice quality-of-life improvement over usingsudo: you can easily see what commands were run with root privileges.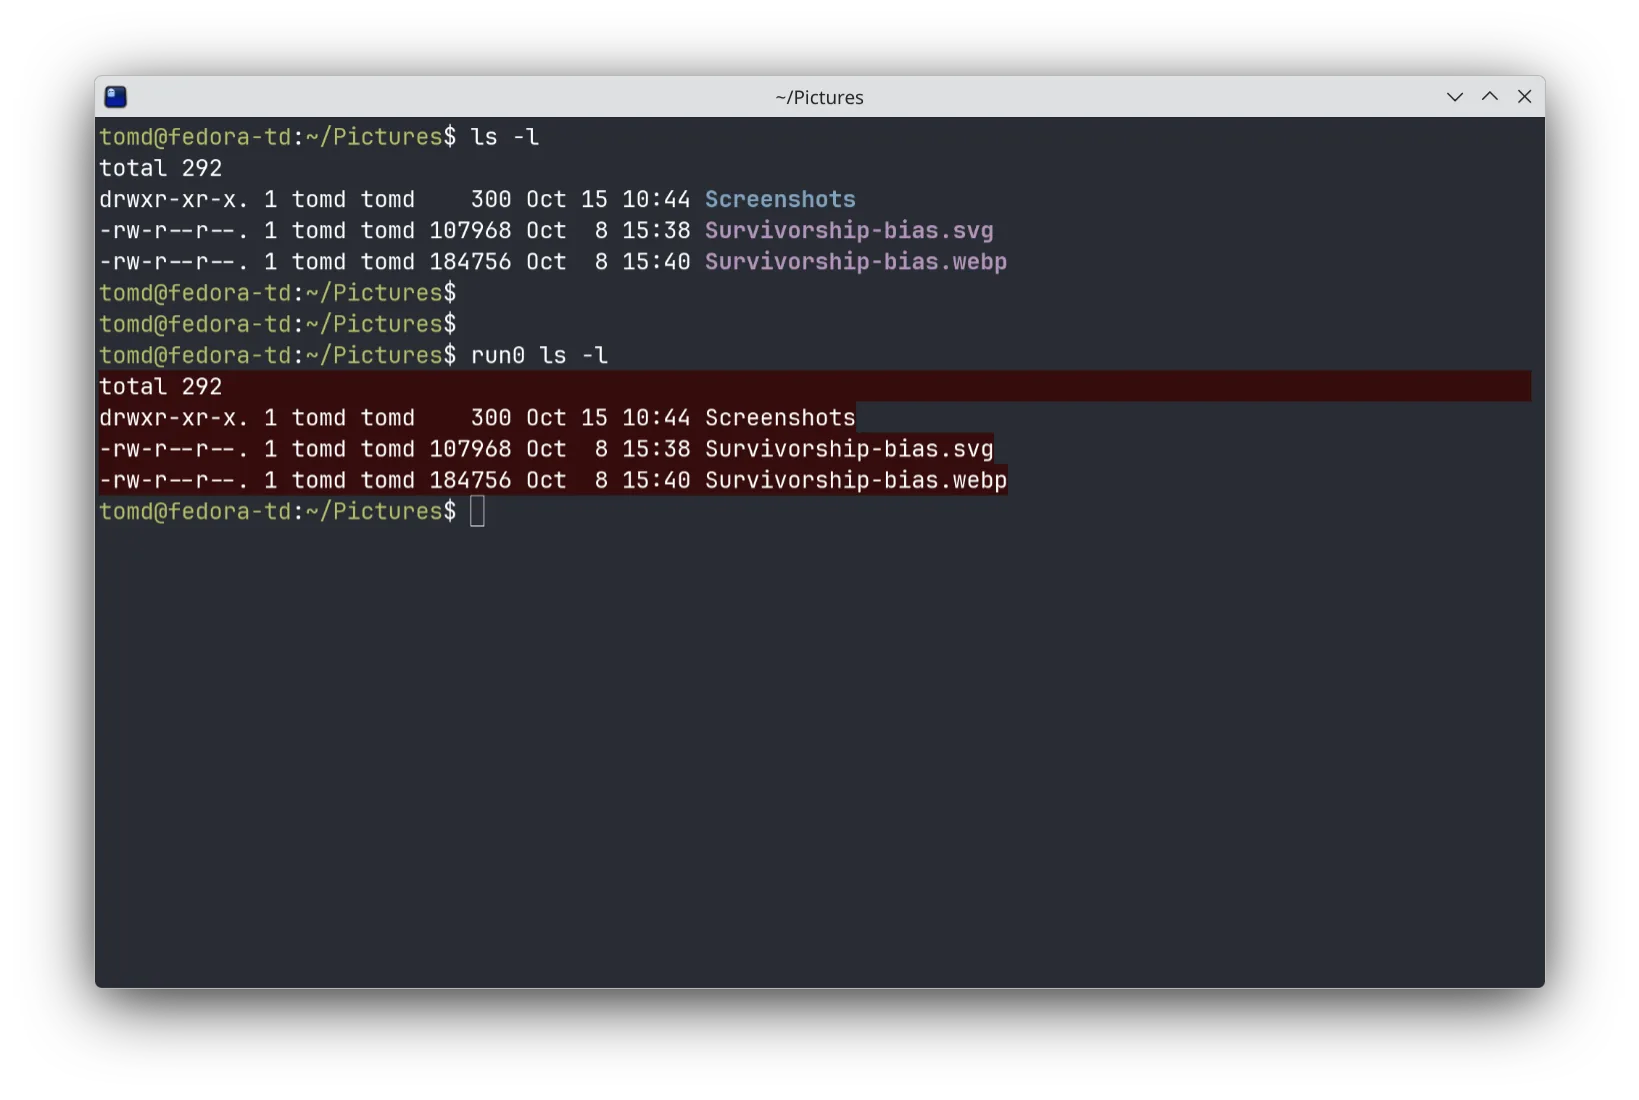
That red background is just a default. You can change the colour or turn it off if you like.
Step 4 – Set up r0 wrapper function
You only need this if your systems uses SELinux (the default if you are using Fedora, as we are). If not, this is optional.
SELinux (Security Enhanced Linux) provides additional security by layering strict access-controls over what applications, processes and users can do, even when they have normal Linux permissions. It limits the damage that compromised or malicious software can cause.
SELinux does not play 100% nicely with run0. In its default configuration, it
effectively prevents run0 from executing certain commands. For example,
run0 ls works fine, but run0 dnf update gets blocked. In this situation,
do not turn off SELinux. It is doing you a good service. Instead, you can
use the following script to create a wrapper function, r0, to bypass the problem2.
Run the script below once in your normal user account and then close the terminal and open a new session.
run0 tee /etc/profile.d/run0-wrap.sh >/dev/null << 'WRAP'
# Wraps run0 so that systemd always execs a shell rather than the target
# binary directly.
# Idempotent: only defines a shell function, safe to re-source.
r0() {
    local -a opts cmd
    local arg sep=0
    for arg in "$@"; do
        if [ "$sep" -eq 0 ] && [ "$arg" = "--" ]; then
            sep=1
            continue
        fi
        if [ "$sep" -eq 1 ]; then
            cmd+=("$arg")
        else
            opts+=("$arg")
        fi
    done
    # No `--` given: treat every argument as part of the command
    if [ "$sep" -eq 0 ]; then
        cmd=("${opts[@]}")
        opts=()
    fi
    if [ "${#cmd[@]}" -eq 0 ]; then
        command run0 "${opts[@]}"
    else
        command run0 "${opts[@]}" /bin/bash -lc "$(printf '%q ' "${cmd[@]}")"
    fi
}
WRAP
This creates the file /etc/profile.d/run0-wrap.sh which defines a function
r0.
Once set up, this function loads every time you open a new terminal session. Now
you can use r0 in place of run0 (in place of sudo). And r0 dnf update
works, where run0 dnf update did not.
# Example use on Fedora
r0 dnf update
r0 systemctl restart sshd
r0 nvim /etc/hosts
For an interactive root shell, plain run0 with no arguments, or r0 is fine:
run0 # or 'r0'When you do this, you will see a red dot appear in the terminal header until you
exit. A nice visual reminder that it is running with root privilege –
especially helpful if you have multiple terminal windows open.
Using parameter options with run0 / r0
run0 has a set of optional parameters,
almost identical to those available for sudo.
You can use these options with the r0 function we set up above, but there is
one small syntactical change you will have to make. Put any run0 options
before a space-separated -- separator, and the command to run (and any of
its parameters) after.
# Example use on Fedora (last example assumes a postgres user exists)
r0 dnf update                           # no options, no -- required
r0 --setenv=MY_VAR=x -- dnf update      # setenv option for run0 set before --
r0 -u postgres --chdir=/tmp -- ls -la   # separate-arg forms fine too
And finally…
Setting up run0 wasn’t the only change we made to improve the security
of our Linux workstations and pass Cyber Essentials but it was the most interesting3.
We are pleased to confirm that, with run0 in place as described here, we were
successful in gaining our Cyber Essentials Plus accreditation.
There aren’t many companies running Linux on company laptops (yet), but if you are one, or you are considering it, we hope this article helps.
Footnotes
-
Tested with Fedora 44 KDE and Gnome, systemd 259. ↩
-
Understanding why this works requires an understanding of how SELinux works. SELinux checks whether a binary is a permitted “entrypoint” into a domain only when the security context changes. Due to the way
sudoworks, there is no security context change and so no SELinux check is triggered. Withrun0, the command is run from a process with a different security context. This triggers SELinux to check whether the binary in question – the command you are trying to run withrun0– has permission to do so, and blocks it if it doesn’t. This could be fixed by making changes to SELinux. But ourr0wrapper function takes a simpler approach by making/bin/bashthe binary being called first, which SELinux already permits. The command you are running with it spawns in a child process of this which, as withsudo, does not change the security context and so there is no further SELinux intervention. ↩ -
We also had to install a dedicated anti-virus tool – we used ClamAV – and tighten user password security rules using the
pwqualityPAM module. We may do another blog on these in future. ↩